
Short recorded walkthroughs, captured directly from a running build. Tap any topic to watch it full-size. Playback needs a browser with WebM support (all current Chrome, Firefox, Edge and Safari 17+).
1. First run and permissions
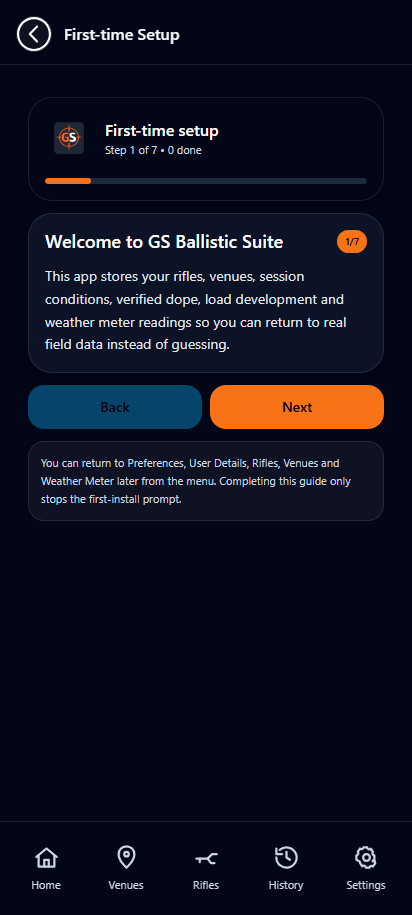
Install the app, review each permission request and allow only the permissions needed for the features you intend to use. Bluetooth and location are required for supported weather-device workflows. Camera and microphone are requested only when their related capture features are used.
A guided first-time setup wizard runs on initial install. Its Welcome screen first asks for the feature level — Standard (the core tools, preselected) or Advanced (adds the specialist tools) — then offers Try it now with sample data — one 6.5 Creedmoor rifle with one load and one venue, starting with Preferences, offered on every new install during the 14-day trial, purchased or not — Set up my own, which steps through Preferences, User Details, Rifles, Venues and Weather Meter, or Skip for now. Any step can be skipped and revisited later, so nothing needs to be finished in one sitting. Sample data is removed automatically when the 14-day trial ends (the setup guide returns if you haven't added a rifle of your own), is never included in a Full Backup, and removing it never touches your own data. During the trial (or while sample data remains), Settings → Preferences can reopen the setup guide or load and remove the sample data.
On first launch a notice explains the 14-day full-access trial and what the free tier keeps afterwards; you get a reminder the day before it ends, and a notice when it has ended. A fresh install shows on-screen guidance panels on every supported screen, in English, Afrikaans or German — choose Hide guidance under Settings → Preferences to hide them. An app update keeps the choice you already saved.
2. Create rifle and load profiles
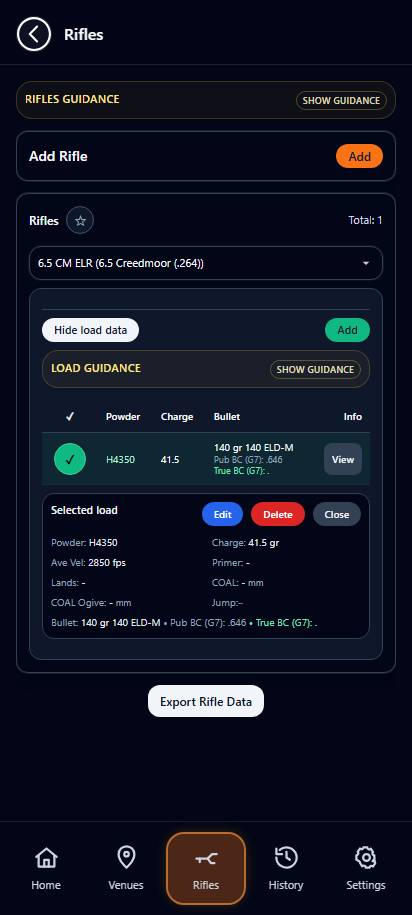
Create a rifle profile first, then add the ammunition or load data associated with that rifle. Enter values carefully and verify units before relying on a calculated solution.
- Create or select a rifle.
- Enter calibre, twist and relevant rifle data.
- Create a load and enter projectile, velocity and ballistic information.
- Save and confirm the correct rifle/load combination is active.
While editing a rifle, Show load data (on the left of the photo line) closes the form and opens that rifle's load data — if anything was changed it asks first (OK saves, Cancel discards). Closing or backing out of an edit selects the rifle again, so its load data stays in view.
Powder Temperature Sensitivity is a tick on the load itself, not an app-wide setting. Ticking it reveals Temp measured — the temperature your normal Ave Velocity was chronographed at — plus optional 2nd and 3rd chronographed velocity/temperature readings from different conditions; the app works out the rate itself and the Solver shows the compensated MV as "Derived from Temp." Ticking it without entering Temp measured blocks saving with a reminder rather than silently doing nothing, and the compensation only applies once a real current temperature is known — Weather Meter, Phone Weather, or a manual entry.
Ave SD is the load's average velocity SD, in the velocity unit from Preferences (more than 0 and at most 50 fps). Hit Probability uses it for the rifle's active load; left empty, Hit Probability assumes 10 fps and says so.
2b. Using Factory Ammo for box ammunition
Factory Ammo is for a rifle where you're shooting box ammunition rather than a chronographed handload. Pick a bullet or factory load straight from the built-in catalog — 1,392 centerfire entries across 61 calibers, plus 70 rimfire entries — or enter the box label, muzzle velocity and bullet weight by hand.
- Open the rifle in Rifles, tap Edit, and enable Use Factory ammo. With it ticked, Add Load in the Rifles tab shows factory-ammo catalogue choices instead of reloading fields, and that rifle can't be opened in Load Development until Use Factory ammo is unticked again.
- Add one load per box or lot right there in the Rifles tab's Add Load form — use Pick from common factory ammo… for common calibers, or enter the box label, muzzle velocity, bullet weight and optional BC by hand. It's stored in the same Load Data list as handloads, tagged Factory, with a simplified view (no powder, charge or seating-depth fields). If BC is left blank, the app estimates a rough starting BC automatically — validate it before relying on it beyond 300–500 m.
- If a Factory Ammo rifle has loads saved but none marked active, a banner above the load list prompts you to tick the one you want; that same tick decides which load Shooting Solution, Wind Effect, Range Card and Target Card all use.
- Factory ammo has no separate entry system in Shooting Solution itself — the Solver always solves from whichever load you marked active in the Rifles tab, exactly like any handload. A small static Factory Load / Box Ammo — Enabled badge appears under the rifle summary there as a reminder only; there's nothing to tap.
2c. Rimfire calibers
Rimfire cartridges (.22 LR, .22 WMR, .17 HMR, .17 HM2, .17 WSM and other rimfire calibers) are always factory-loaded, so they follow a dedicated path rather than the standard centerfire/reloading workflow.
- Rimfire is off by default. In Settings → Preferences, enable Support Rimfire — this is what makes the Rimfire caliber toggle (next step) appear at all. Any rimfire rifle already saved stays fully visible either way.
- In Rifles, tap Add (or edit an existing rifle) and switch on the Rimfire caliber toggle at the top of the form. This filters the Caliber field down to rimfire cartridges only.
- Save the rifle, then add a load as usual. With a rimfire caliber selected, the Add Load form drops the reloading fields (Powder, Charge, Primer, COAL, Jump and bullet length) and shows a quick-pick catalog of common factory rimfire ammo (Eley, Lapua, SK, CCI, Federal, Winchester, Remington, Hornady, RWS, Aguila, Norma) to prefill the ammo label, muzzle velocity, bullet weight and a rough starting BC.
- The catalog's BC is only a rough starting estimate — rimfire manufacturers rarely publish a reliable one — so adjust it if you have better data. If your ammo isn't in the catalog, fill in every field by hand instead.
- Save the load. It's stored the same way as any other load, so History, Sessions, Target Card and Range Card all pick it up automatically.
2d. PCP / air rifle
PCP (pre-charged pneumatic) air rifles are a third rifle platform, separate from both centerfire and rimfire, with their own bore-size range and working-load fields rather than powder charges. PCP support is entirely free — no trial, no purchase, ever, and unlimited PCP rifles don't count toward the free tier's rifle cap at all (see Pricing).
- PCP is off by default. In Settings → Preferences, enable Support PCP / Air Rifle — this is what makes the PCP toggle (next step) appear at all. Any PCP rifle already saved stays fully visible either way.
- In Rifles, tap Add (or edit an existing rifle) and switch on the PCP / Air Rifle toggle at the top of the form. This swaps the usual Caliber field for a dedicated PCP caliber picker covering eight bore sizes from .177 through .50. An optional 310-entry rifle-model picker beneath the toggle fills the Name field for a known PCP rifle; keep typing freely if yours isn't listed.
- Save the rifle, then add a working load. Pick Pellet or Slug as the projectile type, and optionally record tune name, power setting and regulator pressure for reference. Search the 306-entry projectile catalog (21 manufacturers, including Air Arms, FX, H&N, JSB and Daystate) to prefill projectile, weight, diameter and BC — the catalog only fills BC when the source states a G1 or G7 model, and picking a catalog projectile also sets Pellet or Slug to match (still editable). An unlabeled BC (from the catalog or typed by hand) defaults to G1 with an on-screen note, since G1 fits virtually all pellet/slug shapes; type G7 explicitly if you know the projectile is actually modeled that way. A dedicated 10 m/25 m/50 m Match wadcutter section (Qiang Yuan, Vogel, RWS R10/Meisterkugeln, H&N Finale Match) covers true target pellets, which publish weight and head size only — no BC or drag model, since they're shot at fixed close range.
- Enter your own actual chronographed MV — this is never pre-filled from the catalog. Save the load the same way as any other; History, Sessions, Target Card and Range Card all pick it up automatically.
3. Apply environmental data
Use Phone Weather or a supported Bluetooth weather meter. When a valid weather snapshot is active, the app indicates the source and applies it according to the workflow rules.
The weather snapshot is shared by every screen and ranked Weather Meter, then Phone Weather, then Manual. While a Weather Meter snapshot is valid, neither weather button takes a new reading; while a Phone Weather snapshot is valid, Phone Weather doesn't, but Weather Meter does and replaces it; a Manual snapshot is replaced by either, always with a fresh reading. A Weather Meter snapshot always takes its latitude from the phone's GPS. When a button keeps the active snapshot, a message shows which snapshot it is and how many minutes are left — to take a new reading, clear it first in Weather Meter on the home screen. Weather applied by hand with Apply Manual Weather in the Solver, Target Card or Range Card becomes the shared Manual snapshot, valid for 30 minutes from the last entry — Weather Meter, Phone Weather and Manual snapshots are all valid for 30 minutes. While any snapshot is valid, Manual doesn't open and the typed weather boxes are read-only (values still visible) on every screen — Solver, Target Card, Range Card, Sessions, Load Development, ELR Diagnostic, Equipment Reach, Velocity Loss BC and the Weather Meter page — so typed values can never replace it. History is the exception, since it records a past session. A Kestrel Weather Meter reading's wind direction is taken relative to your DOF; with no DOF the wind clock is left alone.
Manual Weather is the same set of boxes on every screen: SP (station pressure), Temp, Humidity and Latitude (History and Load Development: SP, Temp, Humidity), shown and typed in your Preferences units — °C or °F, and hPa, inHg, mmHg or kPa. An empty Latitude fills from the phone's GPS when the boxes open (type it if GPS isn't available; a latitude without a sign is taken as south for Southern Hemisphere users), and density altitude is always worked out from the values you type.
Your own weather meter: the first Kestrel you connect is remembered as yours and always looked for first. If it isn't found but other meters are nearby, you're asked before they're shown; another meter is used for that connection only and forgotten when it disconnects, unless you choose to remember it as yours (for example after changing meters). The meter connects only when needed — a Weather Meter reading disconnects 30 seconds later.
Best practice
Refresh weather when conditions materially change, after moving location, or when the active snapshot has expired.
4. Generate a firing solution
Select the rifle and load, then enter the target distance in the large Distance box at the top; wind speed, wind direction and MV sit on one row below it (MV stays visible and editable, but the keyboard never moves on to it), and the solution is shown large. Wind starts at 0 from 12 o'clock. Selecting a rimfire rifle sets a 50 m starting distance and a PCP rifle 30 m; switching back to a centerfire rifle sets 100 m. After a distance the keyboard simply closes, and the red message under the result reads Tap here to set wind and direction. Tap it to go to wind speed: if you change the wind, the wind direction clock opens next, then Environmentals; if you leave it, Environmentals opens straight away. Any time you change the wind speed and tap Done, the wind direction clock opens. The red message also asks for Environmentals (Temp, Humidity, Pressure) at every distance and, with a centerfire rifle, for DOF only above 420 m — from about 420 m the direction of fire can move the hold by half a ¼ MOA click (about one 0.1 mil click at 1000 m). Rimfire and PCP rifles are never asked for DOF: Environmentals opens at the first weather field instead, and once Temp, Humidity and Pressure are captured the panel closes without asking for DOF or latitude — the same for a centerfire rifle at 420 m or less. Above 420 m a weather read moves to DOF only if it's still empty (a DOF you entered is kept) and asks for latitude only if the phone GPS couldn't supply it. Confirm Direction of Fire again for each new distance, since the target direction can change even when the weather is kept. The Environmentals/DOF panel is outlined green while Temp, Humidity and Pressure are all in — from a snapshot or typed by hand — and red when any is missing. Typing a full 3-digit DOF value moves on to Angle; a typed DOF closes Environmentals only once the entry is complete and every field (Temp, Humidity, Pressure, DOF and latitude where needed) is filled, so it never collapses mid-entry. Distance, MV and temperature follow your Preferences units (metres or yards, fps or m/s, °C or °F) and are converted for the calculation, so type them in the units shown. Station Pressure (SP), QNH and DA also follow your Preferences pressure and distance units, as their labels show. Review the output before use and confirm it against known data.
Centerfire at close range: the scope sits above the bore, so up to roughly the zero distance the bullet is below the crosshair and the Solver correctly shows an Up hold — one that looks large in angular units at very short range (5.6 mil at 10 m is just 5.6 cm). Under 50 m the Solver therefore also shows the hold in cm or inches (Preferences → Measurements → Target), for example "Close range: hold 5.6 cm high", and a distance under 5 m is raised to 5 m with a notice. Rimfire and PCP rifles are not affected.
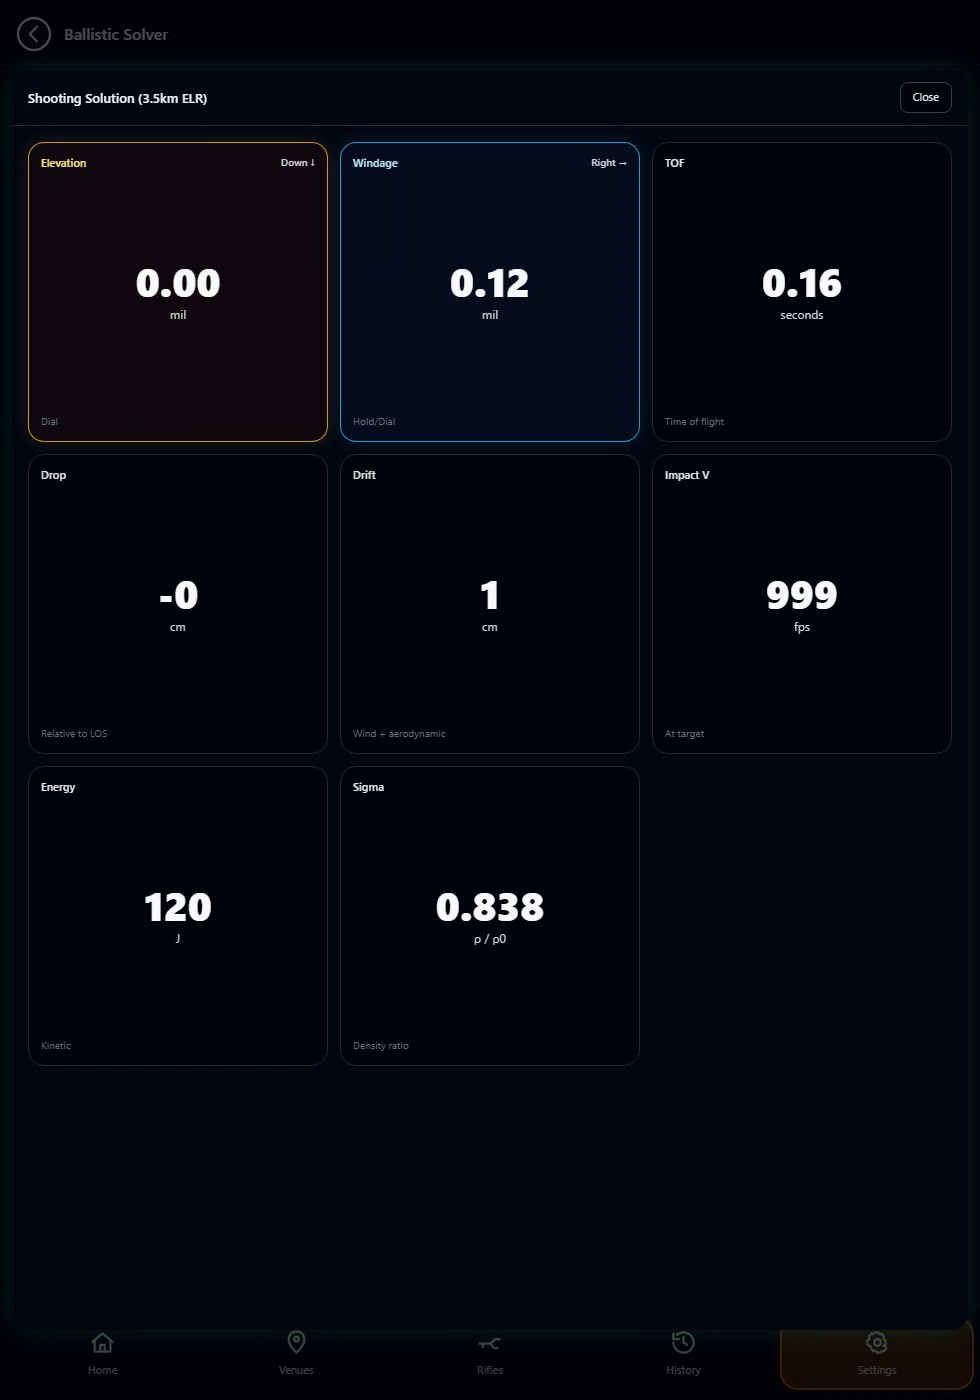
At the zero distance Elevation always shows 0.00 and Windage shows the wind part only — 0.00 with no wind or a head/tailwind. Spin drift and Coriolis are still calculated and kept in the solve, just not shown there; every other distance, and Live Wind, is unchanged.
Weather in the Solver: with no weather yet, Environmentals shows only Phone Weather, Manual and Weather Meter. Phone Weather and Weather Meter fetch straight away; Manual puts the cursor in the first empty field, and once you type the button becomes Apply Manual Weather. Manual opens only while no weather snapshot is valid (with one in play the boxes are read-only). Apply needs Temp, Pressure and Humidity, and saves the values as the shared Manual snapshot, valid for 30 minutes; the panel then closes.
Wind arrow: a green arrow beside Distance shows your Wind Direction — where the wind blows to, with the target at the top — with the degrees and the clock time, in Standard and Advanced. It is a visual aid only and is not shown in the solver embedded in Target Card or Range Card.
Live Wind (Advanced): after a Kestrel Weather Meter reading a LIVE WIND button appears left of Distance. Tapping it connects to your Kestrel (your own meter is retried first) and reads it continuously; STOP or leaving the Solver releases it. It changes only the Windage block (3-second average). Your own Wind and Wind Direction inputs, the elevation and everything else stay on your values, which apply again when Live Wind stops. With a DOF entered, the arrow follows the live wind direction — mount the Kestrel on its wind vane and set its declination (True North), since its heading is used as the Kestrel shows it. If the connection drops, tap LIVE WIND to relink; without a valid Weather Meter reading it asks you to connect to the Weather Meter first. It is hidden while the weather comes from Phone Weather and stops when you leave the Solver.
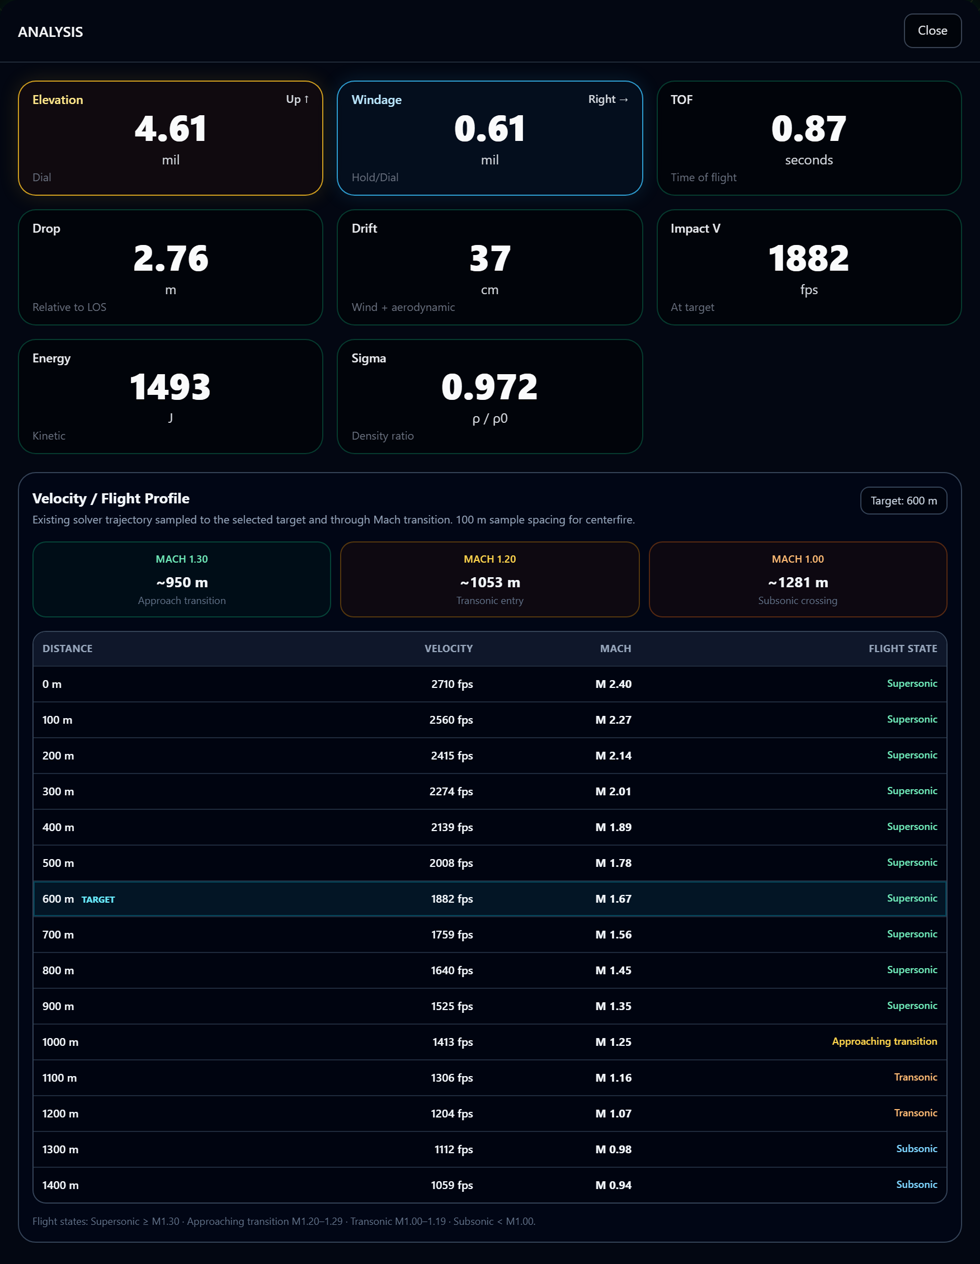
In the Advanced feature level, tap Analyze Ballistics on the result for the full Elevation / Windage / TOF / Drop / Drift / Impact V / Energy / Sigma breakdown, plus a Velocity / Flight Profile panel: the same trajectory solver re-sampled at 100 m spacing (25 m for rimfire) from the muzzle out past your selected target, continuing until the bullet has clearly dropped below Mach 0.95 so the transonic transition stays visible even on a close-range solve. Alongside the distance/velocity/Mach/flight-state table (your target distance highlighted), three callouts show the estimated distance where the bullet crosses Mach 1.30 ("Approach transition"), Mach 1.20 ("Transonic entry") and Mach 1.00 ("Subsonic crossing"). It's read-only and computed on demand from the last successful solve — opening it never changes your rifle, load or environment. A DIAGNOSE TRAJECTORY button below the profile opens ELR Trajectory Diagnostic, pre-filled with the current rifle, distance and environment, if real-world DOPE at this or another distance doesn't match what the solver predicted.
4b. Quick wind calls with Wind Effect
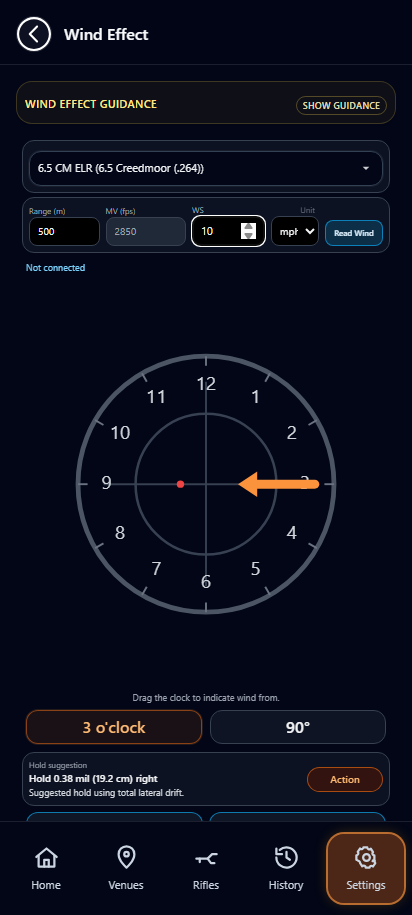
Wind Effect is a faster alternative to the full solver for a single quick decision. Select a rifle, drag the clock face to set wind direction (or read it from a connected weather meter), and enter wind speed and range. The tool returns an immediate hold suggestion with two drift cards — the first in your own units (the rifle's scope unit, MOA or MIL, and your Target measurements unit, cm or inch), the second in the other angular and length unit — without stepping through the full solver workflow.
5. Target Card and Range Card
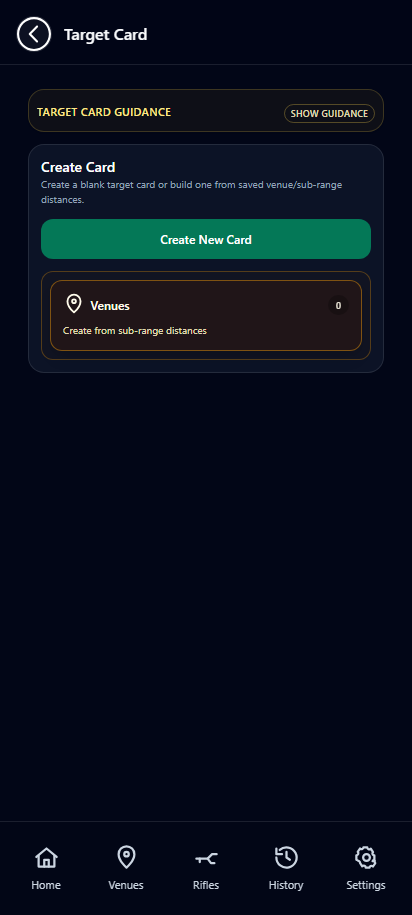
Use Target Card for individually defined targets. Use Range Card when you need a distance-band reference. Both workflows require an active rifle selection. Opening a saved Target Card applies the active weather snapshot and calculates straight away; with no snapshot it opens Environmentals and says so. Range Card follows the rifle chosen in Solver or Target Card. On both, Phone Weather, Manual and Weather Meter sit in one row; Manual opens the shared SP, Temp, Humidity and Latitude boxes (no DA needed — it's worked out) and Apply Manual Weather applies them, valid for 30 minutes. While a Weather Meter, Phone Weather or Manual snapshot is valid the boxes are read-only and that snapshot is used. A new Range Card starts from defaults that follow the rifle — centerfire 100 to 1000 every 100 (metres or yards), PCP 30, then 50 and every 25 up to 250, rimfire 50 to 300 every 25 — also when Range Card opens with the rifle chosen in Solver or Target Card; change them in Range Setup. In the Advanced feature level Target Card also has a Match / Stage button.
5b. Venues and subranges
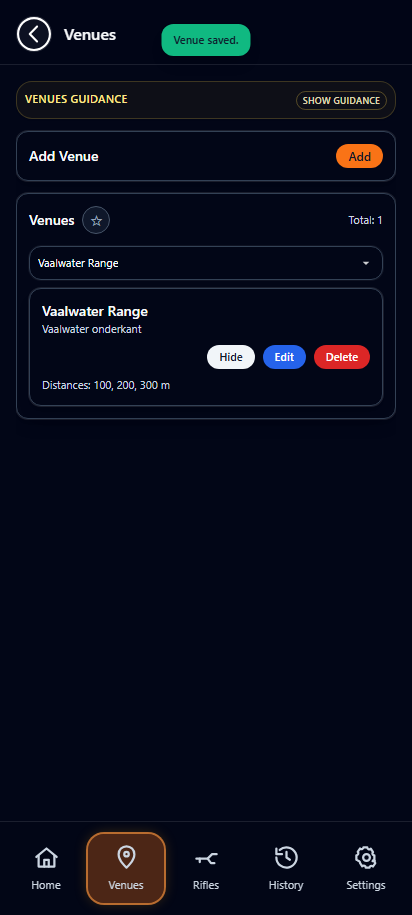
Save a shooting venue with a name, notes, altitude and an optional GPS pin. A venue can either carry its own list of distances, or be broken into named subranges (for example individual lanes or firing points), each with its own distance list that Target Card and Range Card can pull from directly. Favourite frequently used venues to find them faster, and use Route on a venue with a saved pin to get directions back to it.
5c. Range Viewer — live sharing
Advanced feature level only — see Standard and Advanced.
Range Viewer sends a firing solution from one phone to another over Bluetooth so a spotter, coach or second shooter sees the same numbers live. On the sharing phone choose Share; on the receiving phone choose View and connect to the sharing phone from the list. Pick a display layout to suit the situation:
- Spotter — default balanced view with elevation, wind and DOF.
- Competition and Turret — large-print single-number layouts for quick glances at distance.
- Mirror — a plain readout of every row for a second reference device.
- Custom — choose exactly which fields are shown.
When sharing a Target Card, both phones can mark a point of impact on a shared target overlay, which is useful for spotter-to-shooter correction calls. The viewer can be locked to prevent accidental touches while it is being read at distance.
5d. Match / Stage Mode
Advanced feature level only — see Standard and Advanced.
Match / Stage Mode is a competition-day tool for planning and running a full match ahead of time, built on the same rifle and weather-snapshot rules as Target Card and Range Card.
- Create a Match and name it. It uses the rifle in use — the same active rifle as Solver, Target Card and Range Card. A saved Match isn't tied to a rifle: it opens with the rifle in use (the rifle it was saved with is only a record) and never changes the app's rifle; if that rifle is different, the old holds are cleared, so recalculate before live mode.
- Add one or more Stages. For each stage, either hand-key its targets' distance, direction of fire and wind, or tap Import Target Card to pull in an already-saved Target Card as a ready-made stage.
- Tap Recalculate Match with Active Weather to solve every target in every stage in one pass against the current shared weather snapshot. If no snapshot is active yet, the app takes you straight to Weather Meter and finishes the recalculation automatically once one is set — no need to back out and retry manually.
- Stages and targets collapse to a one-line summary (name · distance · Elevation/Windage) so a long stage list stays scannable; tap any row to expand its detail.
- Tap Run Stage to step through a stage one-handed: each target fills the screen with large Elevation/Windage figures, and a Previous/Next bar (Finish on the last target) lets you move through the stage with a single thumb, no scrolling.
6. Sessions and history
Record date, time, equipment, venue, conditions and observations. Session records support later review and help separate confirmed data from temporary field assumptions.
After shooting, open the session from History and use Input Shot Data to enter the real elevation, windage and wind for every planned distance, then mark it completed. Elevation and wind are entered in the session rifle's scope unit (MOA or MIL) and wind speed in your preferred unit, and the PDF export uses the same units. Elevation follows the rifle's zero: inside the zero distance any value is accepted (including negative), at the zero it must be 0 or more, and beyond it more than 0.
Refresh environment: filling in straight after the session, Weather Meter or Phone Weather takes the current weather (a recent snapshot is reused without a new read). Filling in later, type SP, Temp and Humidity (density altitude is worked out) and tap Apply Manual Weather if the weather changed. History records a past session, so the weather snapshot in use now never blocks this — the typed values are always saved. It applies to this saved session only, with no expiry timer and no effect on the weather in the rest of the app; otherwise the saved values stay. In Session Environment the Wind/DOF block closes only once Wind speed, Wind (o'clock) and DOF are all entered, as in the Solver.
History shows Session Summary and Shot History in one frame, with saved ELR Diagnostics runs and Velocity Loss / BC results (Advanced) in their own frame below, each in its own section.
7. Load development
Choose OCW or Ladder according to your testing method. Plan the shots, capture chronograph and impact data, then retain notes and supporting images for the session. Rotate the phone during OCW shot recording and the screen splits side-by-side — charge and velocity entry on one side, a tap-to-mark impact target on the other — instead of switching between two full-screen steps. Redo sits next to Undo for backing out a correction, and in landscape the Velocity field uses a small in-page keypad (space, comma, period and digits) instead of the phone's native keyboard, so the target stays visible while you type — space, comma and period are all equally valid separators between shot velocities everywhere, not just on that keypad.
Choose Round, Square or Diamond for how the OCW target is drawn — a display choice only, it never changes group size or which target you tapped. Tapping impacts on the target automatically estimates that charge's group size, mirrors it into that entry's Notes as a "Group size: …" line, and keeps it live — the on-screen Group value always reflects your latest taps, even after you've also taken a photo measurement, and you can override it directly with a manual edit or a "Recalculate from tapped impacts" button. PDF export is the one place a real photo measurement still takes over permanently once one exists, so the exported group size always prefers photographed data over a tap estimate. A Target icon next to Photo on each result row opens just that charge's own impacts, while the Notes/Photo toolbar's Target icon still shows every charge overlaid together, colour-coded. A photo overrides the taps: once a charge has a photo, its marked holes are used and the taps on the in-app target are not.
The method follows the GS guides Ladder Explained and OCW Explained (Utilities → Documents): a Ladder finds the node — the charges whose impacts stay level while velocity keeps rising; an OCW confirms the best charge inside that node; a seating test then finds the most forgiving seating depth at that charge. An optional Suggested next step box under the results offers Plan OCW from this node on a Ladder (charges inside the node on even steps of about half the Ladder step — never under 0.2 gr, kept between 0.4% and 1% of the charge, at most four loads, one extra below a narrow node, never above the highest charge the Ladder fired; e.g. a 1.0 gr Ladder on a .275 / 7 mm gives 0.5 gr steps) and Plan seating test on an OCW (the best charge, three jumps 0.020 in apart — 0.020 / 0.040 / 0.060 in off the lands — with 3 shots each). Both open New filled in from the stage before (components, seating data, distance, customer), everything stays editable, and New still works as before. When the best charge already groups under 1/4 MOA, the suggestion says a seating test is entirely optional.
Ladder: the test distance is required (impact heights and the node are angles at that distance). Shoot it at 300 yd / 300 m or more (400–600 preferred) — the planner warns below 300 in the unit shown. Every charge is fired at its own point of aim. Until the impacts are marked, the highlighted rows are only a Possible Node from velocity (neighbouring charges within 12 fps), with "Tap the impacts to confirm the node". On the Ladder target photo, Measure walks through the charges in order: tap each charge's point of aim (orange cross), then its hole — each hole is saved at once. Skip charge, Undo (also after reopening the photo) and Start over are available. Once two or more charges are marked, impact height alone decides: the node is neighbouring charges whose impacts stay within 0.5 MOA in height while velocity rises, and the rows read Node — "Impacts level on the target". Charges outside a confirmed node shrink to thin one-line rows so the node stands out. Tap Charge range to hide or show the charge range and Load Summary.
OCW: the wizard's Next stops on a load until every required field is filled (powder, bullet, bullet weight, test distance, BC, Actual Lands, Test COAL, charge and shots). Green, orange and red follow the GS OCW guide — impact position first: with impacts tapped or holes marked on the photo, green is the OCW node, neighbouring charges whose group centres stay within 0.3 MOA in height, middle charge first. A charge out of line vertically is never the node, whatever its group or SD. Without impacts, green is only a possible node ranked by group size, then SD, then ES, with an amber note saying so. A seating test (one charge, a different jump per load) ranks the most forgiving depth first: of the neighbouring jumps whose groups stay within 25% of the best, the middle one. When the jumps differ across a development, every result shows its Jump next to the charge and the OCW PDF prints the Jump values in bold. The OCW PDF's BEST LOAD follows the same rules. The camera with the green dot on a result opens that charge's photo, with its chronograph readings shown bottom-left. Tap Load Summary to collapse it.
Add to load data on an OCW load saves it under the rifle as a new load: its components, the average velocity of all its shots and their velocity SD as Ave SD (used by Hit Probability; carried only with 2 or more shots and an SD of at most 50). The load summary line ends with the Vel and SD that will be sent. The Ladder graph draws smaller dots with a larger speed scale and the charge under each dot, and the Ladder export lists Actual Lands (BTO), Dev Test (BTO) and Dev Test Length (BTT), then Jump and Charge. Ladder recording takes exactly the planned 1 shot per charge, like OCW.
Exports show the shot count: the OCW load summary gives each load's shots on its L1–L4 header line and Total shots beside "OCW; Load Summary", and a Ladder (or single-load OCW) export shows the total next to its heading — each charge's planned shots, or the shots fired once recorded.
Restoring a backup or importing data merges Load Development without duplicating charges or projects: an entry is only replaced by a newer copy, so shots recorded since an older backup are kept, and any duplicate charges from earlier restores are repaired automatically when the app starts.
The camera button on an entry or target takes a photo or chooses one already on the phone (Android's own chooser, no storage permission needed); a chosen photo is measured and calibrated exactly like one taken in the app, and you're asked before an existing photo is replaced. Shot History distance rows work the same way.
After a target photo is saved, a notice asks you to mark its holes — Mark impacts now or Later. Measuring a group from a photo is two steps, full screen (steps and readings at the top, the photo below, + / − / Fit zoom and drag). Step 1 — Set the Scale: tap both ends of something on the target with a known real-world size (a coin, a printed grid square, a ruler mark), enter that length and tap Apply; the scale carries over to the other photos in the project. Step 2: tap the aiming point (orange Aim cross) first, then every hole (No aiming point skips the cross, Undo removes the last tap, Recalibrate redoes the scale). From the marked holes the app works out the group size (widest pair), vertical and horizontal spread, shape (round, vertical or horizontal stringing) and centre against the aiming point, live as you tap; Save writes them to the charge's Group and Notes line, so the PDF exports show them. In Edit mode, Delete photo removes the photo, its measurement and its holes — a photo-measured group goes back to the tapped value, a typed group stays.
The export buttons only show for the load development on screen, and any open export window closes when you change rifle or load development, so an export can never be made for the wrong one. To share a load development, use Utilities → Export (Create / Send Partial Export).
Load Development for Others (Advanced)
For anyone who develops loads for customers. Turn on Load Development for Others in Preferences (Advanced feature level only) and optionally upload a business logo, which then shows on the right of every Load Development PDF header. A new load development gets optional Customer Name and Surname fields, shown under the selected project and in the picker. Ladder and OCW exports add Developed for (the customer) and Developed by (your User Details name, phone and email).
Export Technical Report builds a chart-led customer report in English from the recorded shots. A chooser lists the rifle's Ladders and OCWs (oldest first) — tick the ones to compile; the Ladder before an OCW is suggested because it explains why the OCW charges were chosen. Page 1 gives an unnumbered Result at a glance (facts, result tiles, recommendation, development path and how many points are worth double-checking); numbered sections start at Rifle, components and set-up, and every later page carries a slim header with the rifle and caliber. Each stage is analysed on its own in date order — velocity and impact-height charts, the node, group size, SD / ES, group shape against velocity, findings for every charge, and "Worth double-checking" flags such as outlier shots, high SD, stringing or unmarked photo holes — and the last stage carries the final recommendation. Holes marked on a photo are drawn on a square measuring grid with the orange aiming cross; the in-app ring target is used only for charges without a photo. Tick Add each standard export as an appendix to append the normal Ladder / OCW exports. BC is not part of Load Development reports — add the chosen load to the rifle's Load Data with its BC.
Bullet, Powder, Primer and Case/Brass fields all open a searchable catalog picker — bullet and powder entries prefill weight, BC and length where published; primer and case entries fill in the component name so records stay consistent without typing it by hand. The Primer picker is also available on the Rifles tab's Add/Edit Load form, not just here. Manual entry remains available everywhere for anything not yet in a catalog.
8. Utilities toolkit
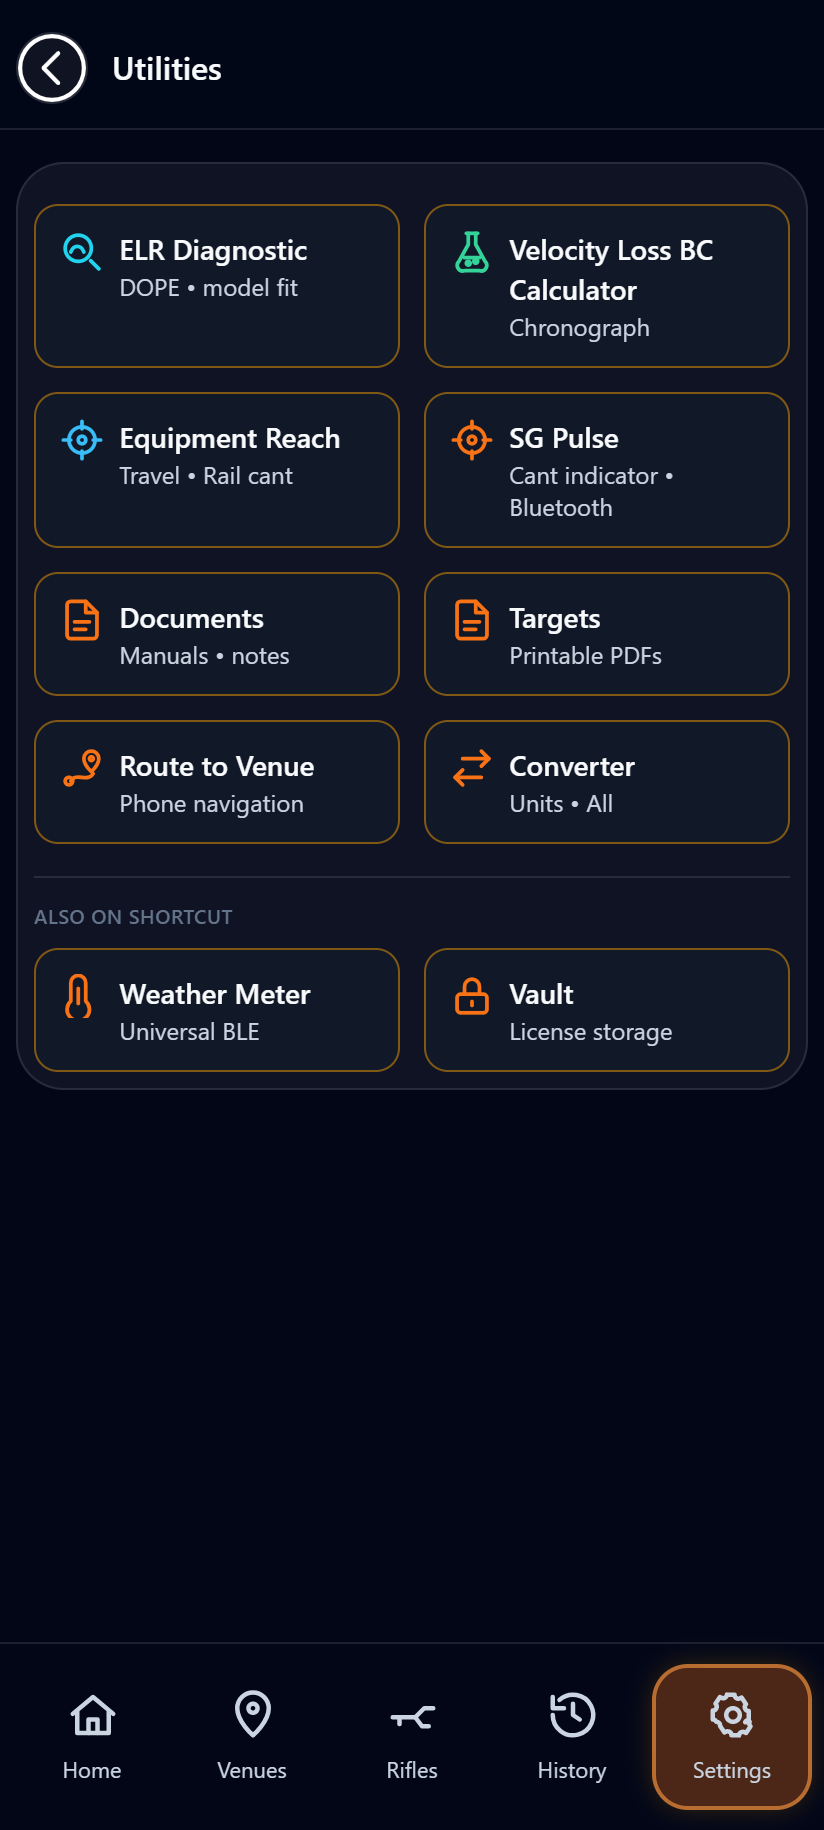
The home screen's Tools section is now labelled Shortcut. The most-used tools — Weather Meter, Vault, Universal Loader, Hit Probability — stay directly on the Shortcut grid; a single Tools button below it opens the Utilities hub for everything else, so the main grid stays short. Weather Meter and Vault are also cross-referenced on the Utilities hub page under "Also on Shortcut," even though they live on the Shortcut grid; Universal Loader and Hit Probability are Shortcut-only and aren't listed on the Utilities hub page at all. Backup/Restore and Export/Import moved out of the Utilities hub entirely — they now live only under Settings, see below:
- ELR Diagnostic — read-only multi-model trajectory diagnostic tool; see below.
- Velocity Loss BC Calculator — solves BC from chronograph readings taken downrange; see below.
- Equipment Reach — checks whether the mounted scope and rail can dial a distance; see below.
- SG Pulse — live rifle-cant indicator and shot timer over Bluetooth; see below.
- Documents — a searchable library of reference PDFs that can be opened or shared directly.
- Targets — a library of printable PDF targets for zeroing, grouping and load-development work, grouped into MOA, MIL and Standard and by distance (100, 200 and 300 m); the MOA and MIL sheets are true-scale with a built-in ruler check, so print at 100%. The 300 m ladder / OCW sheets come as MOA on one A4 page (12 points, 0.5 / 1.0 MOA rings) and MIL on two A4 pages per point, taped together along the cut line and registration marks. Open, share or print directly.
- Route to Venue — reopens the venue routing picker directly.
- Converter — categorised unit conversions for shooting, reloading and weather values.
- Weather Meter — direct Bluetooth readouts from a supported meter, independent of the solver workflow; lives on Shortcut, cross-referenced here.
- Vault — secure storage for firearm licence photos. Add a licence with a name and calibre, capture front and back photos, then search, view, edit or export any stored licence to PDF. Add an optional expiry date to get reminders 6, 3 and 1 month before, then weekly, even with the app closed; the expiry badge turns amber from 6 months, bright amber from 1 month and red in the last week. Free and unlimited. This is unrelated to app purchases; it is personal document storage only. Lives on Shortcut, cross-referenced here.
- Universal Loader — connect and control a compatible BLE powder dispenser; Shortcut-only, see below.
- Hit Probability — first-shot hit % on your target, and every rifle ranked by it; Shortcut-only, see below.
8b. Universal Loader — powder dispenser control
Connect a compatible BLE powder dispenser from the Tools / Utilities hub and control it directly from the app, without switching to the manufacturer's own app.
- Open Universal Loader from Shortcut and tap Tap to Scan — one unified scan finds any nearby supported loader (AutoTrickler or RCBS ChargeMaster Link) in a single pass; no brand needs to be chosen first.
- Tap a result in the discovered-devices list to connect — each one is tagged with its brand and shows signal-strength bars, and the loader you used last is badged Last Used and listed first. If a completed scan finds nothing compatible, a Scan Again button appears. While connecting you stay on the scan list — the chosen loader shows a moving Connecting bar and the loader screen opens once connected. Disconnecting later returns you to this same scan screen, and a connected loader that drops the link goes back to it with a notice. Universal Loader always shows in the Dark look, even when the app uses Daylight; your theme returns when you leave.
- After an unexpected disconnect, or when the app is reopened, Scan first reconnects the last AutoTrickler directly, then runs a 15-second recovery scan that connects it as soon as it's seen. If it still doesn't appear, switch the AutoTrickler off for 10 seconds and scan again. A deliberate Disconnect forgets it.
- The scan screen also has a Supported Loaders panel (every loader type and whether it is Supported or still in Development) and a Diagnostics panel (connection state and found devices, with Copy Diagnostics for support requests).
- AutoTrickler (BT05, V4 tested; V3 unverified) — once connected, the screen goes full-bleed over the app's usual header and navigation, with its own Control / Loads / Powder / Calibration tab bar at the bottom. Each has its own in-screen Help button covering that specific workflow: dispensing, Load Recipes, Powder profile management, and guided Powder Calibration (LTF/STF, quality rating and history). The Loads tab is a searchable Recipe Library — filter saved recipes by name, cartridge, bullet or powder. Powder profiles live only in the app, so there's no limit on how many you keep (the V4 only receives the active powder's settings); Use on a powder makes it active and opens Control, and the Select Powder picker on Control has Add Powder to create one there — the saved powder becomes active.
- RCBS ChargeMaster Link — connect, then declare whether the scale is currently in AUTO or MANUAL mode. AUTO/MANUAL can only be switched with the physical MODE key on the scale itself; the app cannot change it remotely, so the keypad stays locked until the current mode is confirmed, and DISPENSE stays disabled while Manual mode is declared — Manual is trickle-only from the scale itself, so the app never sends a dispense command in that mode. A Control/Load/Calibration/Setup tab bar mirrors AutoTrickler's navigation (Load and Setup are placeholders for now, and Setup also holds Disconnect); guided calibration is available from the Calibration tab and keeps any in-progress result if you switch tabs and come back.
Powder profiles and recipes are stored on-device and are included automatically in the app's existing Full Backup/Restore; there is no separate backup path for Universal Loader data.
This same dispenser control also exists as Universal Loader, a separate, standalone app sold on its own — see its page for what it does differently from this built-in Tool.
8c. Hit Probability
Advanced feature level only — see Standard and Advanced.
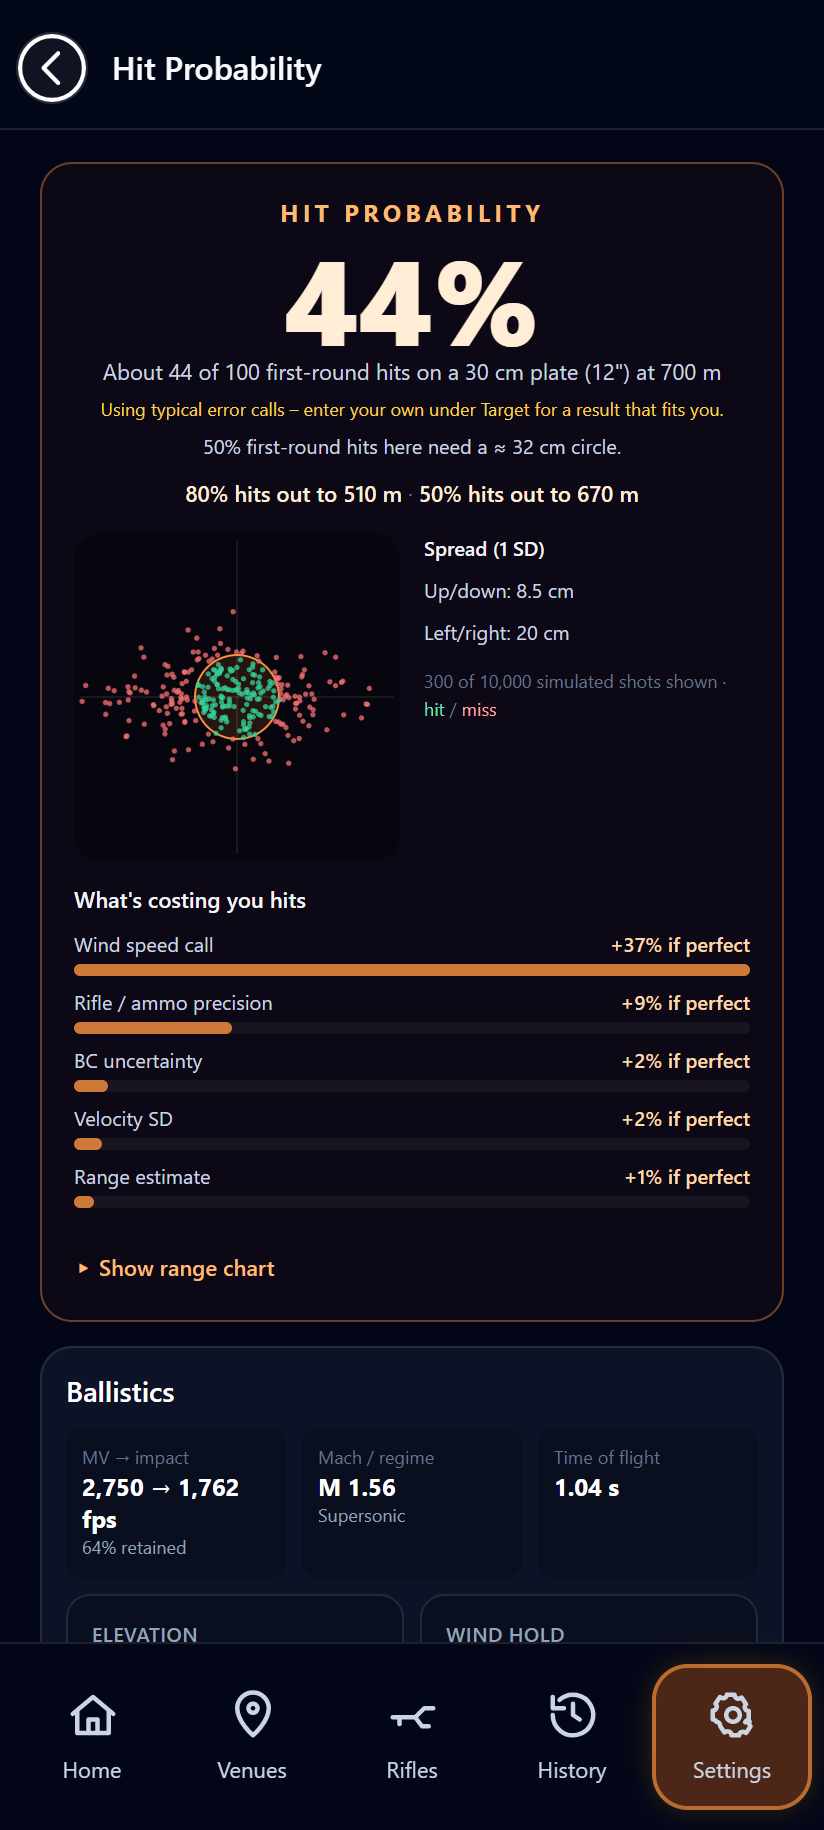
Hit Probability answers how likely your first shot is to hit your target, with the errors every shooter makes. It uses the same exact solver as every other calculation in the app to measure how far the impact moves for each kind of error, then simulates 10,000 first-round shots and counts how many land on the target.
- Open Hit Probability from Shortcut, choose a rifle, then enter the shot: distance, DOF, shot angle, wind speed and Wind O'clock. It reads the live shared weather snapshot before solving — if none is active or a value is missing, you're redirected to Weather Meter and brought straight back.
- Pick the Target: 1 MOA circle, 1.5 MOA circle, 10 / 20 / 30 cm plate, IPSC 46 × 76 cm, or Custom (circle or rectangle). With Target measurements set to inch the presets are true inch sizes: 4 / 8 / 12 in plate and IPSC 18 × 30 in. Until you pick one on a visit, the target follows the distance — the 30 cm / 12 in plate up to 799 (m or yd), IPSC from 800, and a 1.5 MOA circle from 2000 (sized for the distance, as ELR targets are); a target you pick is never overridden, and a custom size is remembered. Its angular size at the current distance shows underneath in the rifle's scope unit. A 20 cm plate at 900 m is a far harder shot than an IPSC target.
- Open Input Your Error Calls and enter how far off each call might be — these are errors (±), not the wind or distance themselves. Wind speed, wind direction and range calls apply to every rifle; This rifle is just its field group size. BC certainty comes from the load (±0.5% for a trued BC or a CDM drag curve, ±1% for a published BC) and velocity SD is the Ave SD of the rifle's active load — when none is entered, 10 fps is assumed and a message asks you to add Ave SD to the load; the note under This rifle shows which. Your calls start at 0 on every visit, since they depend on the day — enter your own, or tap Reset to typical (2 mph, 15°, 3 m) — and are kept while you switch rifles or go to Weather Meter and back. Each rifle's field group (typically 1 MOA, 5 shots; at most 2 MOA) is remembered. A warning shows while your calls are 0 or still typical.
- Tap CALCULATE. The hit % is how many of 100 first shots land on the target. The result also shows an impact plot with the 1-SD spread, how far you keep 80% and 50% first-round hits (Show range chart draws the whole curve) and What's costing you hits — the hits you'd gain if each error were perfect. Work on the top one first; at long range it is nearly always the wind call. The wind itself isn't the problem, since you dial for it — what costs hits is how sure you are of it.
- CALCULATE works out only the chosen rifle — other rifles are not solved. CALCULATE ALL RIFLES answers one question: for this exact shot, which of my rifles gives the best first-round chance? Every rifle gets the same distance, wind, weather and target plus its own group. Read it by order — rifles a few percent apart are effectively equal — and compare the target size each rifle needs for 50% hits, the clearest comparison at long range. A rifle that needs more than 90 mil elevation at the distance can't reach it for an aimed shot: it gets no hit % and is listed at the bottom with the reason.
- Nothing recalculates while you type. After changing the target, your calls or the shot, the results are marked out of date: tap RECALCULATE to redo the selected rifle, and RECALCULATE ALL RIFLES to update every rifle in the ranking. Not sure which rifle to use? Tap Get the Job Done to step through the shot one field at a time and get your three best rifles.
8d. ELR Trajectory Diagnostic
Advanced feature level only — see Standard and Advanced.
A read-only calculator for a specific question: why does this rifle's actual impact diverge from its predicted trajectory at long range while staying accurate closer in? It does not true or alter the rifle — it asks which mathematical explanation best fits all the vertical DOPE you enter, without forcing one distance to match at the expense of the others.
- Open ELR Diagnostic from Utilities, or tap DIAGNOSE TRAJECTORY inside Analyze Ballistics' Velocity / Flight Profile panel to arrive with rifle, distance, weather, and the first distance's shot conditions already carried over. The Environmentals card is collapsible — collapsed automatically once valid weather arrives (from the handoff, or from Phone Weather / Manual entry / Weather Meter here), expanded when something still needs attention. If a Weather Meter reading is active and Phone Weather is pressed, it's retained rather than overwritten.
- Select the rifle being diagnosed, then enter Observed Vertical DOPE: the elevation you actually needed to centre the group at 2–6 real distances from that rifle/load. Distance follows your app-wide unit preference; elevation follows the selected rifle's own scope unit.
- Each distance row carries its own DOF and Wind (speed and o'clock) alongside its distance and elevation, since the direction and wind can differ between groups shot at different times — only weather (temperature, pressure, humidity) is shared across every row. A new row defaults to 0° DOF and a light 3 o'clock breeze; adjust each to match what was actually happening when that group was shot.
- Tap ANALYSE TRAJECTORY. A run with Velocity-banded BC in play can involve 500+ trajectory solves, so a staged progress indicator shows what's currently being tested rather than a frozen button.
- The tool fits four competing explanations — Zero / elevation offset, Muzzle velocity, Global BC / drag, and Velocity-banded BC / ELR drag (needs 4+ observations; flagged with a caution note unless it clearly beats the simpler models by a real margin) — and ranks them by RMSE (Root Mean Square Error) across every entered observation, not just the one that diverged — the average miss, in your data's own unit, so a model that only "fixes" the far point at the cost of the verified near ones loses; lower RMSE means a closer overall fit. The Best mathematical fit card names the winner; a Model Comparison list below it shows every candidate's RMSE, max residual — the single worst-fitting observation, worth checking even when RMSE looks good — and % change versus the stored load.
- Scope tracking isn't tested as a fifth ranked model — there's nothing this app can safely act on even when it is the true cause. If none of the four meaningfully improve on the stored load, a No sensible explanation found advisory appears instead of a falsely-confident best fit — pointing to a tall-target test for scope tracking, but only after ruling out shooter-side causes first (single called shots rather than group centres, cant, parallax, unverified weather).
- A Recommended Validation Distance suggests the range where the two best-fitting models diverge most, so your next shot can actually discriminate between competing explanations instead of guessing.
8e. Equipment Reach Planner
Advanced feature level only — see Standard and Advanced.
A single-rifle mechanical check: can the current scope and rail/base actually dial the elevation a target distance needs? Scope travel and rail cant are entered fresh every time, not stored on the rifle — this is a rarely-needed check, not a live workflow field.
- Open Equipment Reach from Utilities, select the rifle, and enter the desired distance.
- Enter that scope's mechanical setup right here: available Up travel and Down travel from the established zero, the travel unit, and the current Picatinny rail/base cant in MOA. Measure actual usable travel to the mechanical stops — don't enter advertised total scope travel unless it's genuinely what remains from your zero.
- GS solves that rifle's exact active load against the active weather snapshot through the normal Ballistic Solver, using a fixed level-shot test condition (0° shot angle, 0 mph wind, DOF 0°) so the equipment comparison isn't confused by wind or angle effects. The same Phone Weather / Manual / Weather Meter row used elsewhere updates it; if a Weather Meter reading is active and Phone Weather is pressed, it's retained rather than overwritten.
- If the required elevation is within the stored Up travel, the setup passes and GS shows the remaining mechanical reserve. If the scope is short but has enough Down travel from zero, GS calculates the minimum additional rail/base cant that could recover the missing elevation while still allowing the present zero in theory.
- If rail cant alone can't recover enough travel, tap GET ME THERE for a ranked plan instead of just a shortfall: a single Recommended Solution (a standard rail/base size, or a combined rail-plus-reduced-scope-travel fix), followed by Alternatives — an adjustable canted mount, the minimum usable scope travel to shop for, a Prism/TARAC-style external elevation device (pairs with Shooting Solution's Scope / Prism offset), dialing to the mechanical limit and holding the remainder in the reticle, and a CHECK RIFLES pointer to Hit Probability if another saved rifle/load needs less elevation here. Higher rail/mount cant and taller scope rings aren't the same thing — raising scope height above the bore doesn't add usable long-range turret travel, so ring height is never one of the recommendations.
8f. Velocity Loss BC Calculator
Advanced feature level only — see Standard and Advanced.
A chronograph-based inverse solve: instead of trusting a published BC, work one out from your own measured velocity loss over distance.
- Open Velocity Loss BC from Utilities. Selecting a rifle is required — nothing below runs until one is chosen. The rifle's own platform sets the drag model automatically and read-only (RA4 for rimfire, G1 for PCP, G7 for centerfire); its stored active-load MV auto-fills Muzzle velocity (edit it any time with a fresh chronograph reading), and its platform plus MV tailor the suggested reading distances. For a PCP the suggestions come from the active load — its BC, or else pellet/slug, weight and diameter — and aim for about 50 / 100 / 150 / 200 fps of speed loss over four readings, up to 100 m; a note under the readings says what they were based on.
- Set the atmosphere using the same Phone Weather / Manual / Weather Meter row used elsewhere in the app — it adopts an already-active weather snapshot automatically on entry, or fetch a fresh one.
- Add one or more downrange readings (up to 5): a distance and the velocity your chronograph measured there. Use two chronographs, or move one between shot strings. The minimum reading distance is 10 m for a PCP or rimfire rifle, 50 m otherwise; edit or replace any suggested row freely.
- Or import them: Import chrono file (under the muzzle velocity) and Import File (beside Add Reading) read the file your chronograph app exports — CSV, TXT or Excel, one or several shot strings, fps or m/s, comma or dot decimals (Garmin Xero, LabRadar, MagnetoSpeed and others). GS lists each string with its shots, average, SD and ES and suggests where it goes — the muzzle velocity or a reading — which you can change. Each string's average is used; SD, ES and the shot count are kept for the report. Typing over an imported value drops its statistics.
- Tap CALCULATE. GS bisection-searches for the drag parameter that reproduces the measured velocity loss — a BC for G1/G7, or a drag-scale factor (DSF) for RA4 using the rifle's actual bullet weight and diameter — using the same drag tables, density model and integrator as Shooting Solution. The first Calculate asks you to confirm the muzzle velocity was measured at this test (the rifle's stored MV may not be today's), or to type today's reading; a typed or imported MV counts as confirmed. The inputs then fold into a one-line summary (Edit Inputs opens them again) and the screen jumps to the result.
- One reading gives a single effective result. With two or more, the headline is a best-fit BC fitted to all readings together, so no single noisy reading decides it. It shows the average miss and how far the fit misses each reading. Each velocity band also gets its own BC for the load's Multi-BC bands (a drag-scale factor per segment for RA4).
- A recommendation compares those misses with chronograph accuracy (about ±3 fps): Single BC when one BC fits every reading within that, so the band differences are just measurement noise; Multi-BC when the near and far readings miss in opposite directions by more than that, so the BC really changes with speed (with only two readings, a third would confirm it); check a reading when one middle reading misses while the others fit; and a single BC with a re-measure note when the readings scatter with no speed trend. It's a suggestion only — both save options stay available.
- Choose how to keep it: Save to rifle writes the best-fit BC to the active load as its trued BC (Multi-BC off), Save as Multi-BC writes the velocity bands, turns Multi-BC on and also sets the trued BC to the best-fit BC, so the two always match — a PCP BC is saved as a plain number (always solved as G1), a centerfire BC keeps its G7 label — and Save to History only leaves the rifle untouched. When the recommendation is Multi-BC, Save as Multi-BC is shown first. Saving to the rifle asks you to confirm first. Rimfire results are a drag scale, not a BC, so they save to History only. Every save is listed under History → Velocity Loss / BC with its Findings — the recommendation, how far the fit missed each reading, and the spread of the band BCs. There's one record per calculation: saving it again (for example History first, then to the rifle) updates that record rather than adding a duplicate. Records are included in backups and removed with their rifle.
- After saving, Export Report (PDF) shares a one-page report: the headline BC and recommendation, a velocity-over-distance chart (measured averages with SD bars and the best-fit curve), a BC-by-velocity-band chart, the readings with shots, SD, ES, speed loss, fit miss, segment BC and Mach, What the new BC changes (the elevation hold with the load's previous BC vs the new one at typical distances, in the rifle's scope unit) beside a hold-over-distance chart of both, the distances where the bullet goes transonic (Mach 1.2) and subsonic with each value, the conditions and data-quality checks. The velocity chart shades the transonic zone (Mach 1.2–0.9) where the bullet reaches it. For rimfire the comparison is the new drag scale against the stock RA4 curve (×1.000) at 50–200 m. When the load has a bullet weight, the top line shows it and What the new BC changes adds an Energy column — remaining energy with the new value, in J or ft-lb per Preferences. Records in History → Velocity Loss / BC have the same Export button; records saved before 4.6.37 export without the sections they lack, and those saved before 4.7.5 have no bullet weight or energy.
8g. SG Pulse — rifle cant indicator
Connect a Shooters Global Pulse unit over Bluetooth from Tools / Utilities for a live cant readout, independent of the solver's own spin-drift and Direction of Fire workflows.
- Open SG Pulse and tap Scan for SG Pulse, then tap a discovered unit to connect — each result in the scan list is tagged Pulse or Pro — or Show all nearby devices to try connecting to hardware not yet recognised by name. The green CONNECTED button disconnects when tapped again.
- Set Allowed cant to the tilt you're willing to accept — the display stays green while the rifle is inside that limit. The cant reading comes straight from the unit, and on a unit that supports it the allowed cant is also read from and saved on the unit (0.2° steps), following any change made on the unit or in another app.
- Calibrate unit (the small link next to RIFLE CANT) stores level in the unit itself: hold the rifle level and still, confirm, and the unit calibrates in about 2 seconds. Set Level only zeroes the reading in this app and isn't a required step; a successful Calibrate unit clears it so the two never add up.
- LEFT or RIGHT shows which way the rifle is canted, and the number is the angle from level.
- Type a Timer period — up to 16:39, 3:00 by default and not remembered between sessions — tap Apply, then START. On a Pro this runs on the unit itself; on a standard Pulse the same timer runs on the phone instead, with three start tones before the countdown begins. A running Pro timer survives an app restart or the unit reconnecting, and a Start the unit refuses is retried automatically. While a Pro timer runs, an ongoing notification keeps the app alive in the background and the screen stays awake.
- In Alert, set times and beeps (minutes/seconds, sorted longest first, red x to remove one) up to 5 alerts, pick a Beep sound (pitch and length), then tap Apply — on a Pro these send to the unit, and Apply after a finished run also puts the 0:00 display back to the period. Tap CONNECTED when done to disconnect. Closing the app always releases the unit's Bluetooth link (a Pro keeps timing and the run is picked up on the next connect), and a failed scan or connect resets fully so you can simply scan again.
9. Settings and calibration
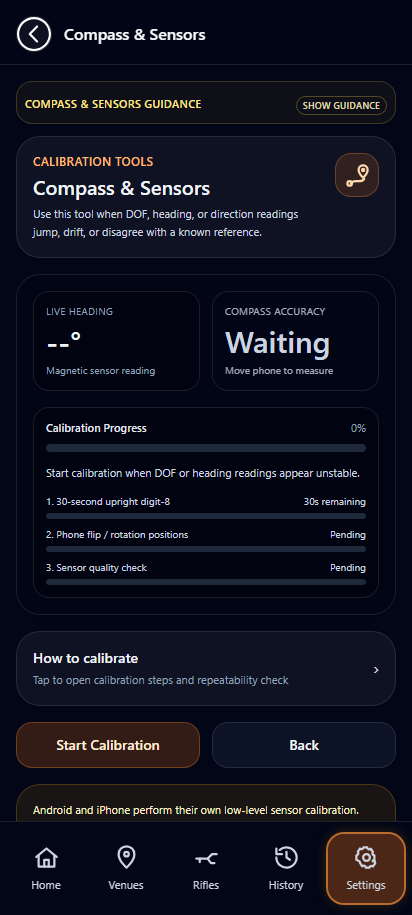
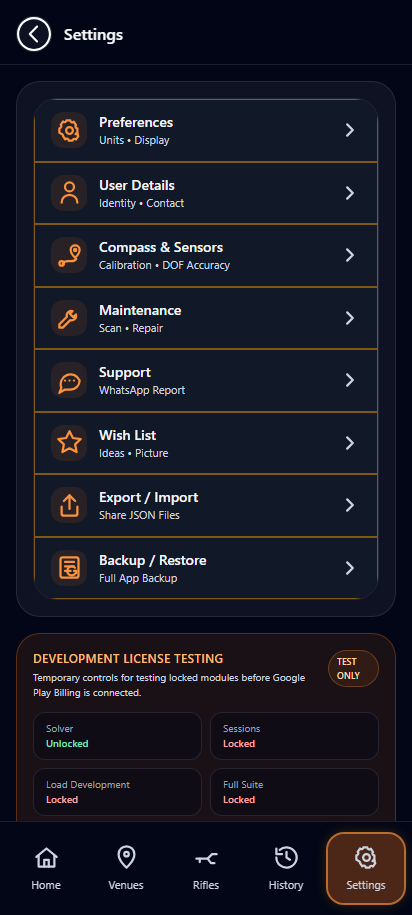
Settings covers Preferences (units, display, the feature level, Show or Hide guidance with the guidance language, the Theme — Daylight, a light high-contrast look for bright sun with charcoal structure and one orange accent for key actions, or the original Dark mode; a new install starts in Daylight, an existing install keeps Dark until you change it, and the choice switches at once and is kept on this device — and the Rimfire toggle described below — under Measurements, Rifle sets cm or inch for scope height and barrel length and Target sets it for target sizes, hit spread and wind drift; Target follows Rifle until you set it separately — and, during the trial, the setup guide and sample data), User Details, Maintenance — a hub holding Database Maintenance (scan/repair of stored data), Compass & Sensors and Erase All Data as separate screens — Support — the in-app Wish List now lives inside Support rather than as its own Settings entry — and About, which shows the installed version with a direct link to check for updates on the Play Store. It's also the only place for Backup / Restore and Export / Import — both were removed from the Utilities hub to close a duplicate path; see Backup and restore below.
Standard and Advanced
Feature level in Settings → Preferences decides which tools are shown. Standard shows the core tools: Solver, Target Card, Range Card, Sessions, Load Development, Weather Meter and the everyday utilities. Advanced adds ELR Diagnostic, Velocity Loss BC, Hit Probability, Match / Stage, Equipment Reach, Tools to True, the extra Analyze Ballistics data, Competition Mode, Live Wind, live sharing (Range Viewer) and the spin drift, Coriolis, aerodynamic jump and WMM switches. It only changes what is shown — it never downgrades the solver or changes saved rifle/load data, and corrections that are switched on keep applying in Standard, where the Solver shows an Advanced corrections active note. A new install chooses on the Welcome screen (Standard is preselected); an existing install starts on Advanced so nothing disappears. Change it any time. Show / Hide guidance is a separate setting.
Manage Purchases on the Settings → About page opens the purchase screen directly — switch between Solver, Sessions and Load Development on one screen to see live pricing and buy, or tap Restore Purchases if a purchase made on another device hasn't synced. Once every module is unlocked, this row relabels to License Status. See Pricing for the 14-day trial, what the free tier caps, and current prices.
10. Backup and restore
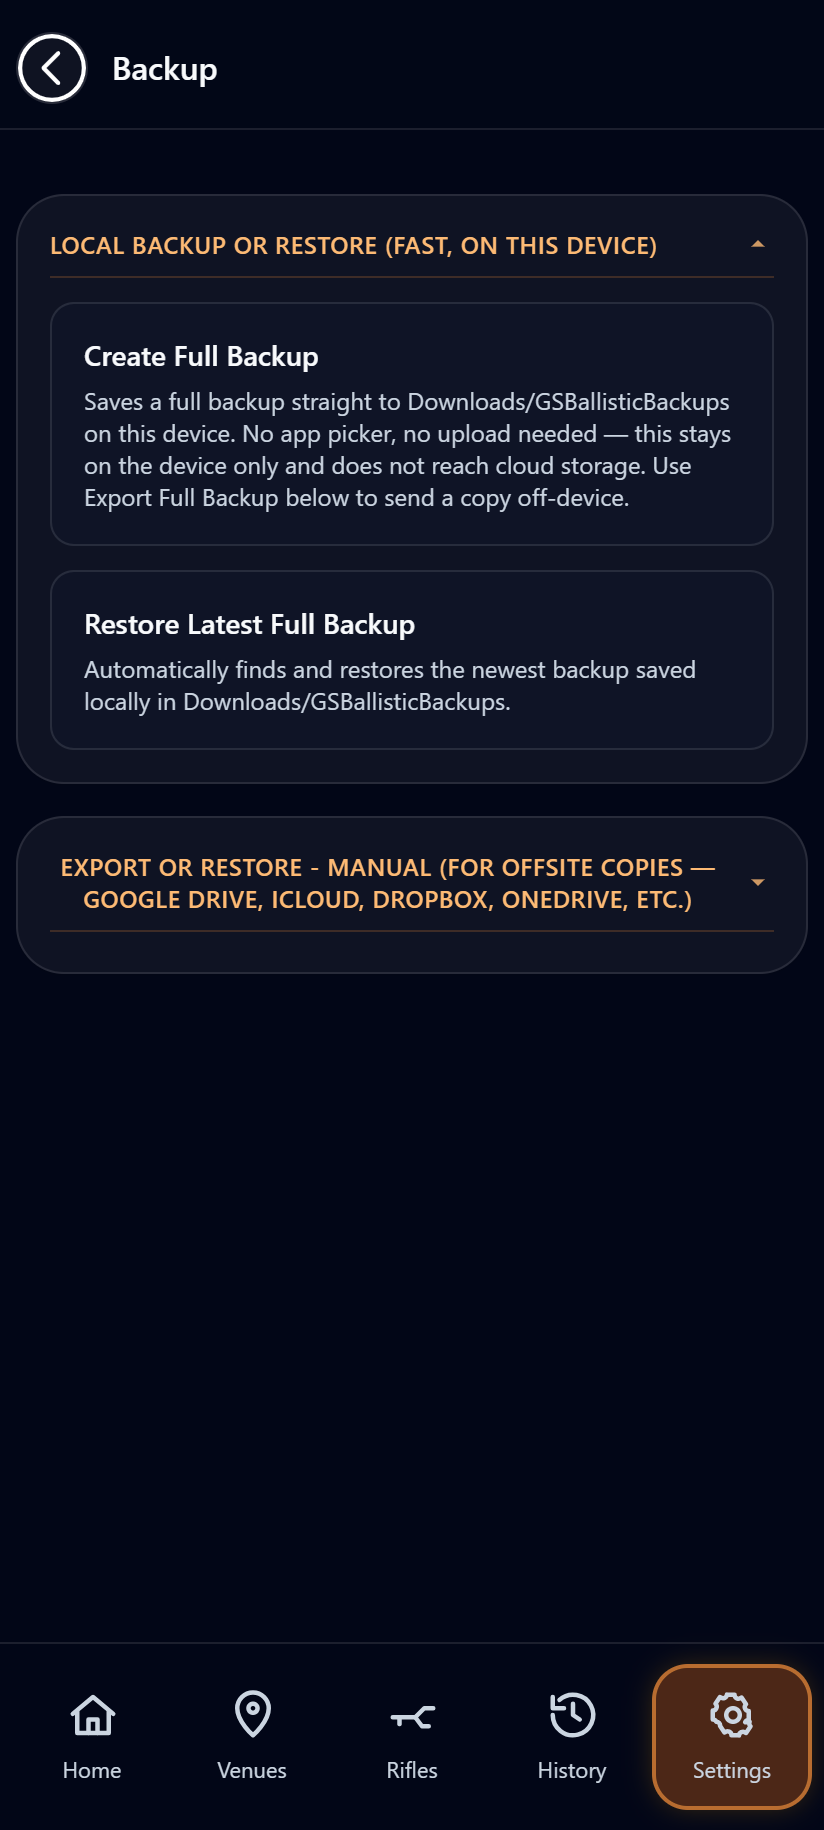
Open Settings → Backup / Restore for a full local backup or restore, and Settings → Export / Import for individual JSON data files per rifle, venue, session or load-dev project. Create backups regularly, especially before reinstalling the app or changing devices. Exported backups may contain personal, rifle, shooting and media data and should be stored securely.
10b. Import from other ballistic apps
Switching from another app? Settings → Export / Import holds two collapsible sections — GS-to-GS sharing (open by default) and Import Files from Other Ballistic Apps, which only expands when tapped.
- Tap Choose Export File(s) and pick a Strelok (.srl) export, an Applied Ballistics/Kestrel (.pro) profile readable as text/XML (several at once is fine), or a GS backup JSON. GS identifies the source automatically — there's nothing to choose yourself.
- Strelok is load data only. Its rifle setup fields (caliber, twist, scope, zero) have repeatedly proven unreliable or missing in real exports, so GS never creates a rifle from a Strelok file — a "Load data only" badge appears instead of a rifle checkbox, and every load underneath gets its own checkbox plus an Attach to dropdown to route it onto one of your existing rifles (defaulting to GS's closest bullet-diameter match, or Skip when nothing matches with confidence).
- Applied Ballistics/Kestrel and GS backup files still create a new rifle as a per-rifle checkbox with its own per-load checkboxes underneath (Select all/none available) — untick just the load(s) you don't want without dropping the whole rifle. GS establishes each rifle's real caliber from its declared caliber or name (e.g. "6.5 CMoore" resolves to 6.5 Creedmoor) and from named bullets it recognizes (e.g. "Scenar 139" resolves to .264in) — only ever using a match it's fully confident in — then flags any load that disagrees. A flagged load is hidden from the list by default, collapsed behind an "N load(s) hidden — Show" toggle so it never clutters the preview, but stays reachable if you know it's actually correct.
- Tap Import All as New Rifles. Every newly created rifle lands as a brand-new record — GS never overwrites an existing one. Only rifle and load inputs are mapped; trajectories, DOPE, wind, environment and solution data are deliberately left behind and recalculated by GS itself. Imported loads don't assume Factory ammo — Strelok and AB are trajectory calculators, not reload logs, so they don't record that distinction either way.
Need help?
Visit Support for troubleshooting and bug-report requirements.